0-6-0 Saddle Tank Steam Locomotive Instructions
Questions? Contact me at thezmaker@gmail.com
Parts Needed
Brass 0-6-0 Shell (available here)
plastic Finishing Parts (available here)
Tools Needed
Small Flat Head Screw Driver (5/64 or 3/32)
Light duty pliers
Recommended Tools
Micro Trains Tap and Drill set for coupler mounting
Metal Files for smoothing out print lines if desired
Primer (Tamiya Surface Primer or Rustoleum Clean Metal Primer).

0-6-0 Saddle Tank Locomotive
Thank you for purchasing the Saddle Tank shell!
This is a shell replacement for the Marklin 8800 or 8805 BR-89 Z-scale locomotive.
It has not been tested on the newer versions of the chassis.

Step 1
Wash the brass shell with Dawn dish detergent to remove any grease, finger prints, or residue.
When the shell is thoroughly dry, it can be primed and painted.

Step 2
Wash the Saddle Tank Finishing Parts with Dawn dish detergent. Use a toothbrush to scrub the excess resin from the surface.
Once the Saddle Tank Finishing Parts are clean and dry, they can be painted directly with Testors Model Master Acrylic black paint. No primer is needed.

Step 3
Unscrew the bottom plate of the BR89 and remove the fishhook style couplers. If you have the Micro Trains #902 short shank Couplers, install one on the front of the chassis(leave the rear coupler box empty). Place the bottom plate back and screw it shut.

Step 4
Using pliers, pull off the bumpers from the front and rear.

Step 5
Use a tooth pick to push the button at the back of the locomotive. This will release the back of the shell from the chassis.
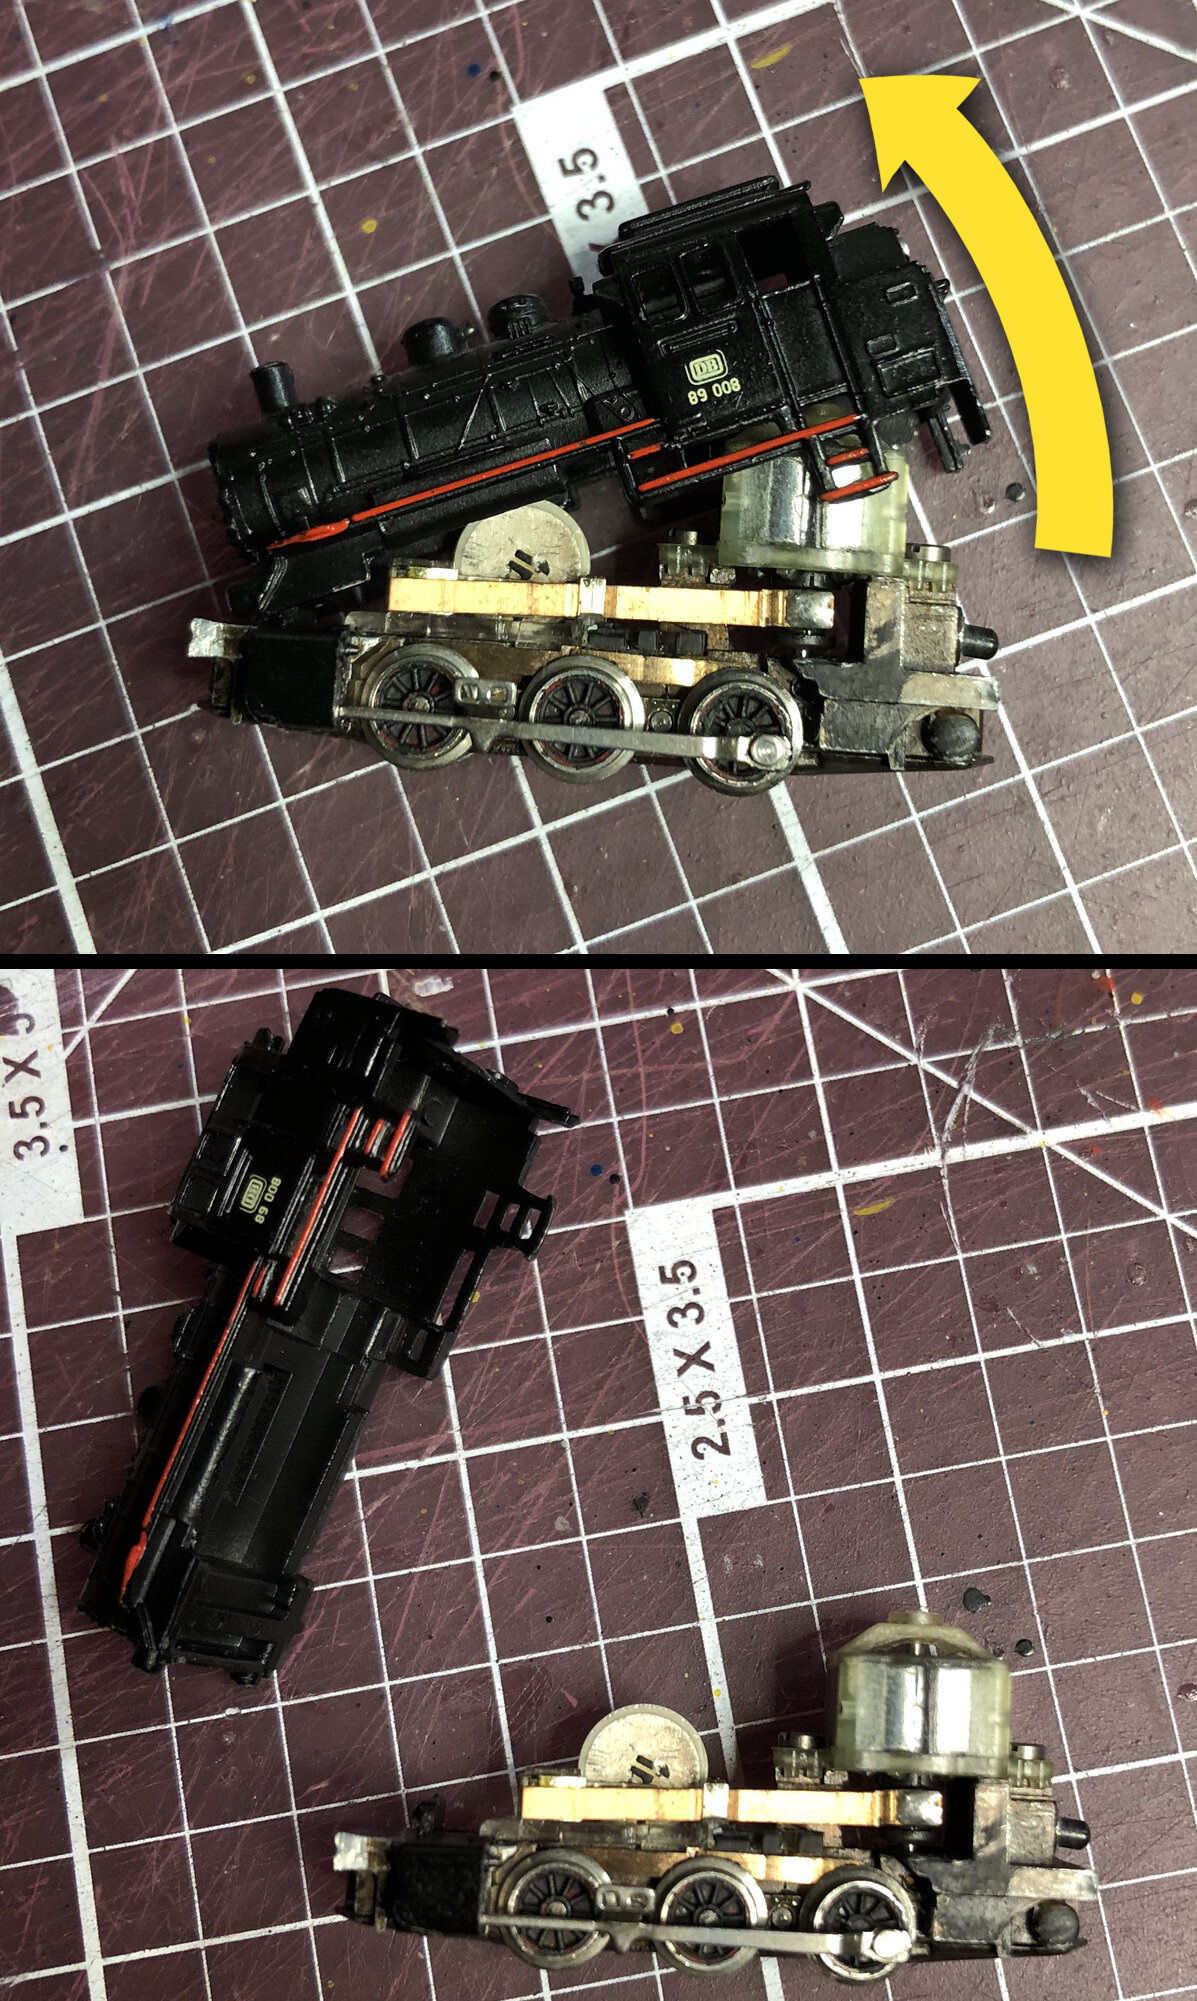
Step 6
Pull the shell up and rotate toward the front to remove it completely.

Step 7
Pull off the rod details. They are not needed.

Step 8
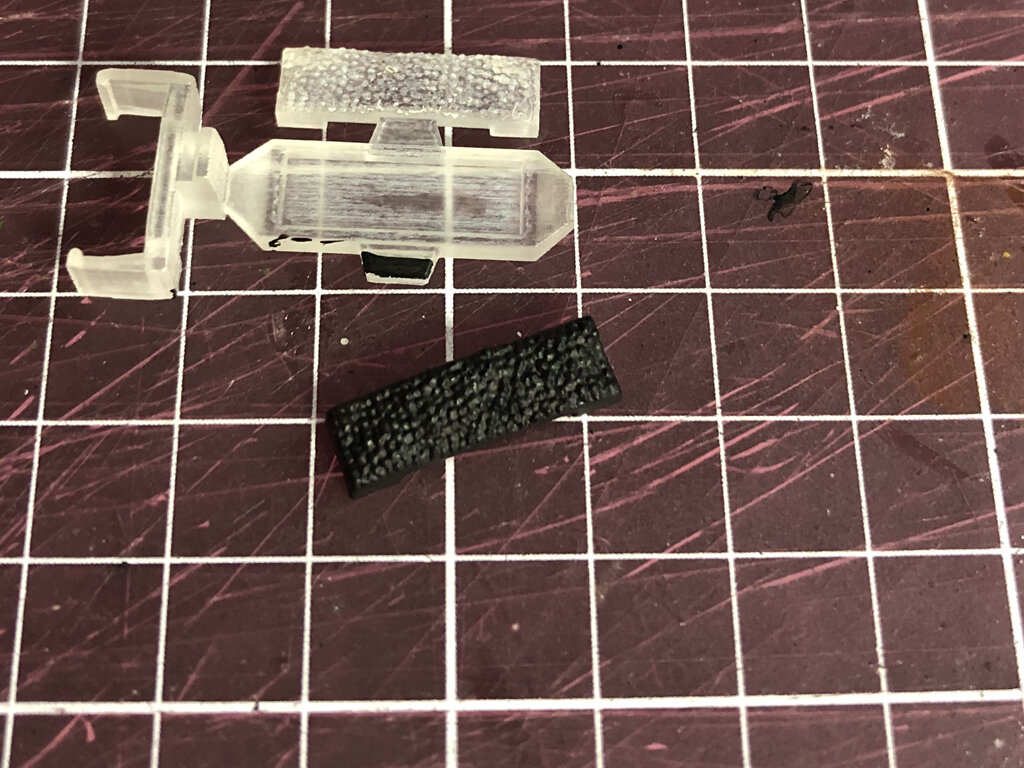
Snap off one of the clips from the Saddle Tank Finishing Parts.
Step 9
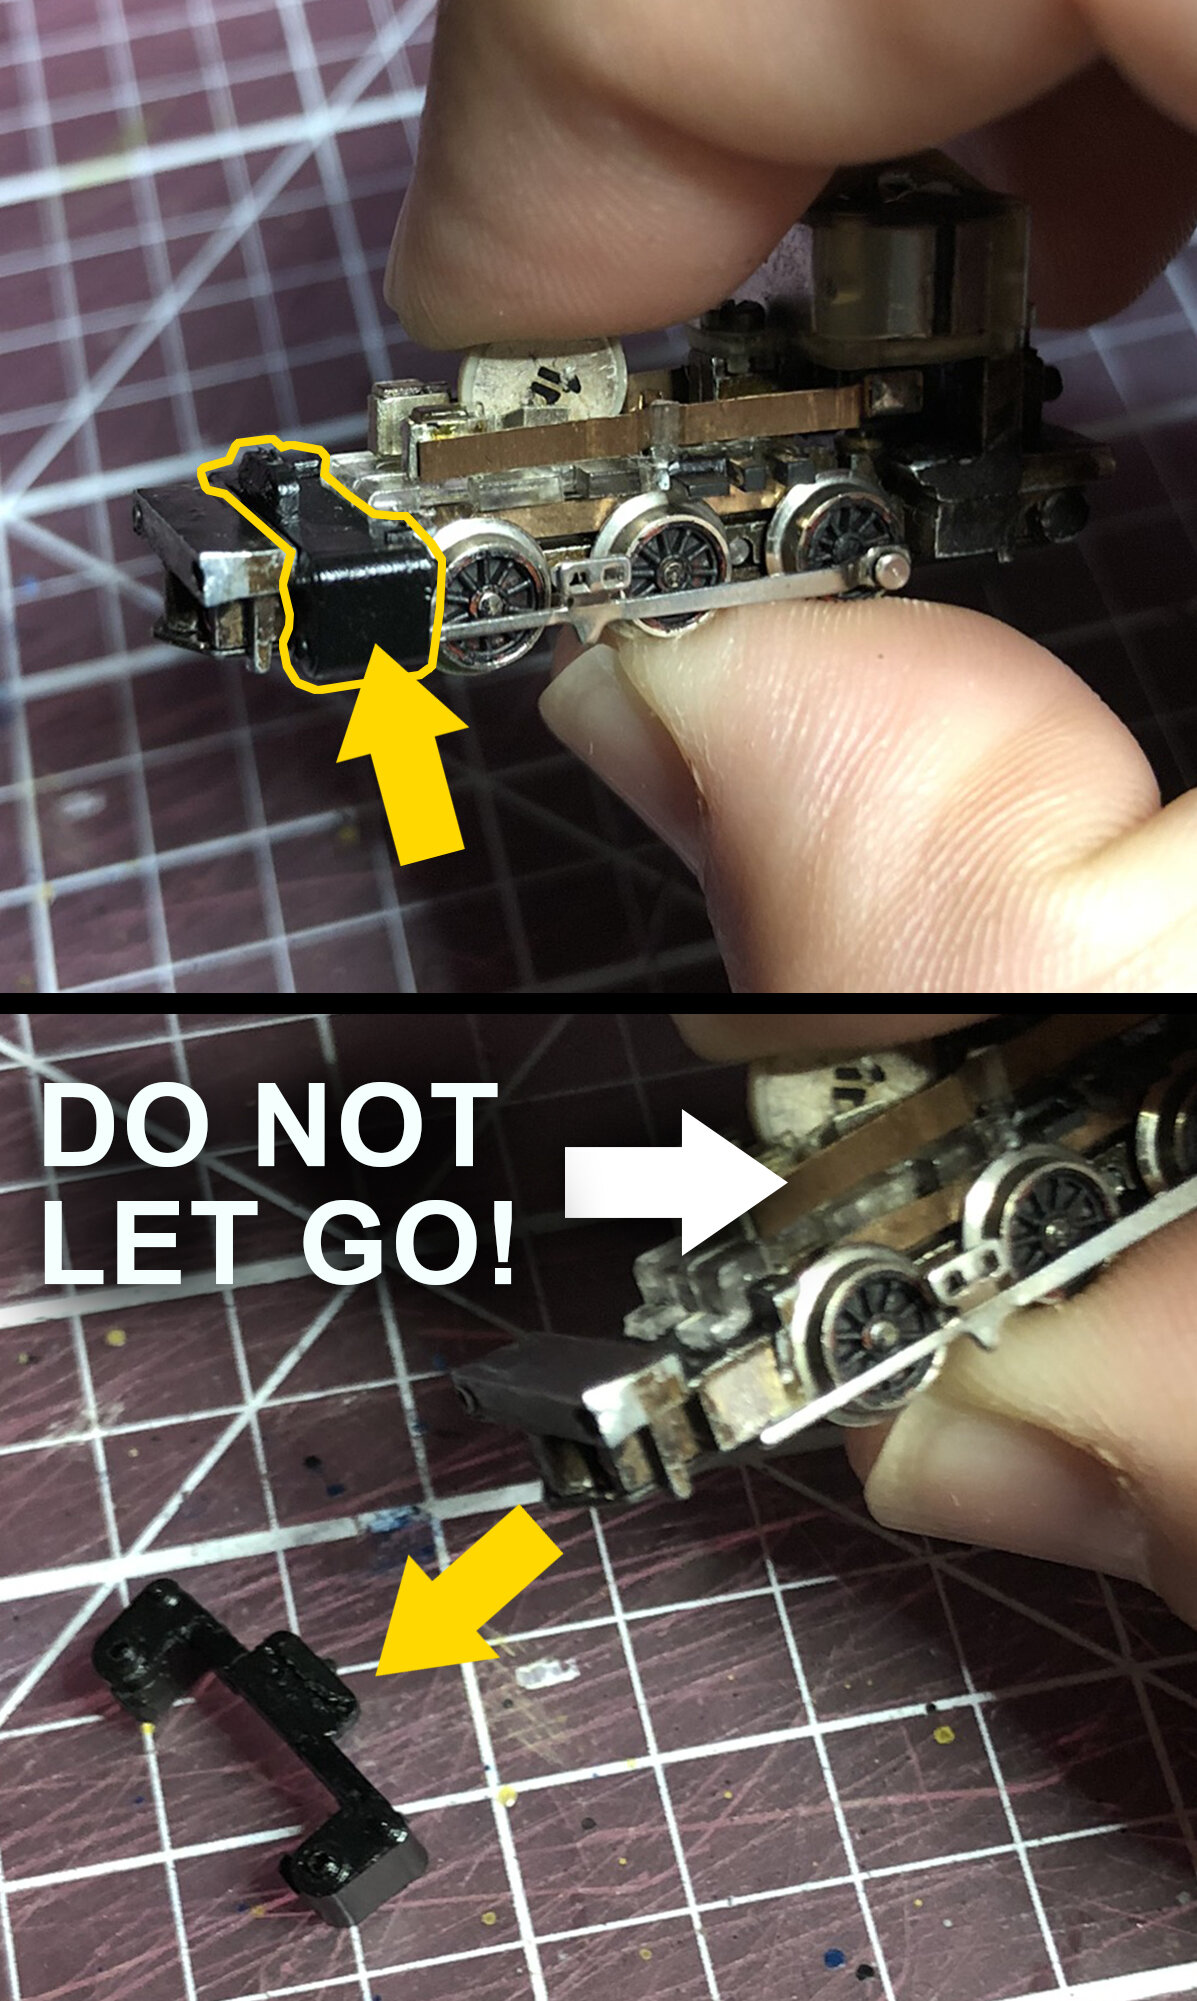
-Grasp the chassis from above and below (or use a light duty clamp to hold the chassis together).
-Peel off the black clip (piston details). The clip has small tabs that grip the bottom of the chassis. It is easy to take it off if it is pushed up from the bottom.
-DO NOT LET GO OF THE CHASSIS. Keep it held together between your fingers.
NOTE: The clip holds the chassis together. Electronic components may fall off if you let go of the chassis. If they do come apart, you will have to insert the metal tabs behind the wheels and insure all parts are back in place before moving on to the next steps.

Step 10
Carefully slide the clip from the Saddle Tank Finishing Parts over the chassis where the previous clip sat.
The center part of the clip must be pointed to the front of the locomotive.
Try not the bend the clip too much. The plastic is strong but brittle.

Step 11
Make sure the clip is set all the way down into the space.
If you have not painted the clip, now is a good time to do it. If not painted, the clip may be seen when the shell is mounted on the chassis.
This is also a good time to paint the red wheels black.
NOTE: There are two clips available in case a clip snaps while mounting it to the chassis.

Step 12
There is a square shaped slot in each piston.

Step 12 A
Insert the piston rods into the piston slots.

Step 12 B
Maneuver the shell over the motor and push the front end down and back. It should hook on to the plastic clip that is mounted to the chassis.

Step 12 C
Pinch the cab area until the chassis button clicks into place.
Step 13
Break off one of the coal details from the Finishing Parts. Sand down or scrape away any flash from where it connected to the sprue.
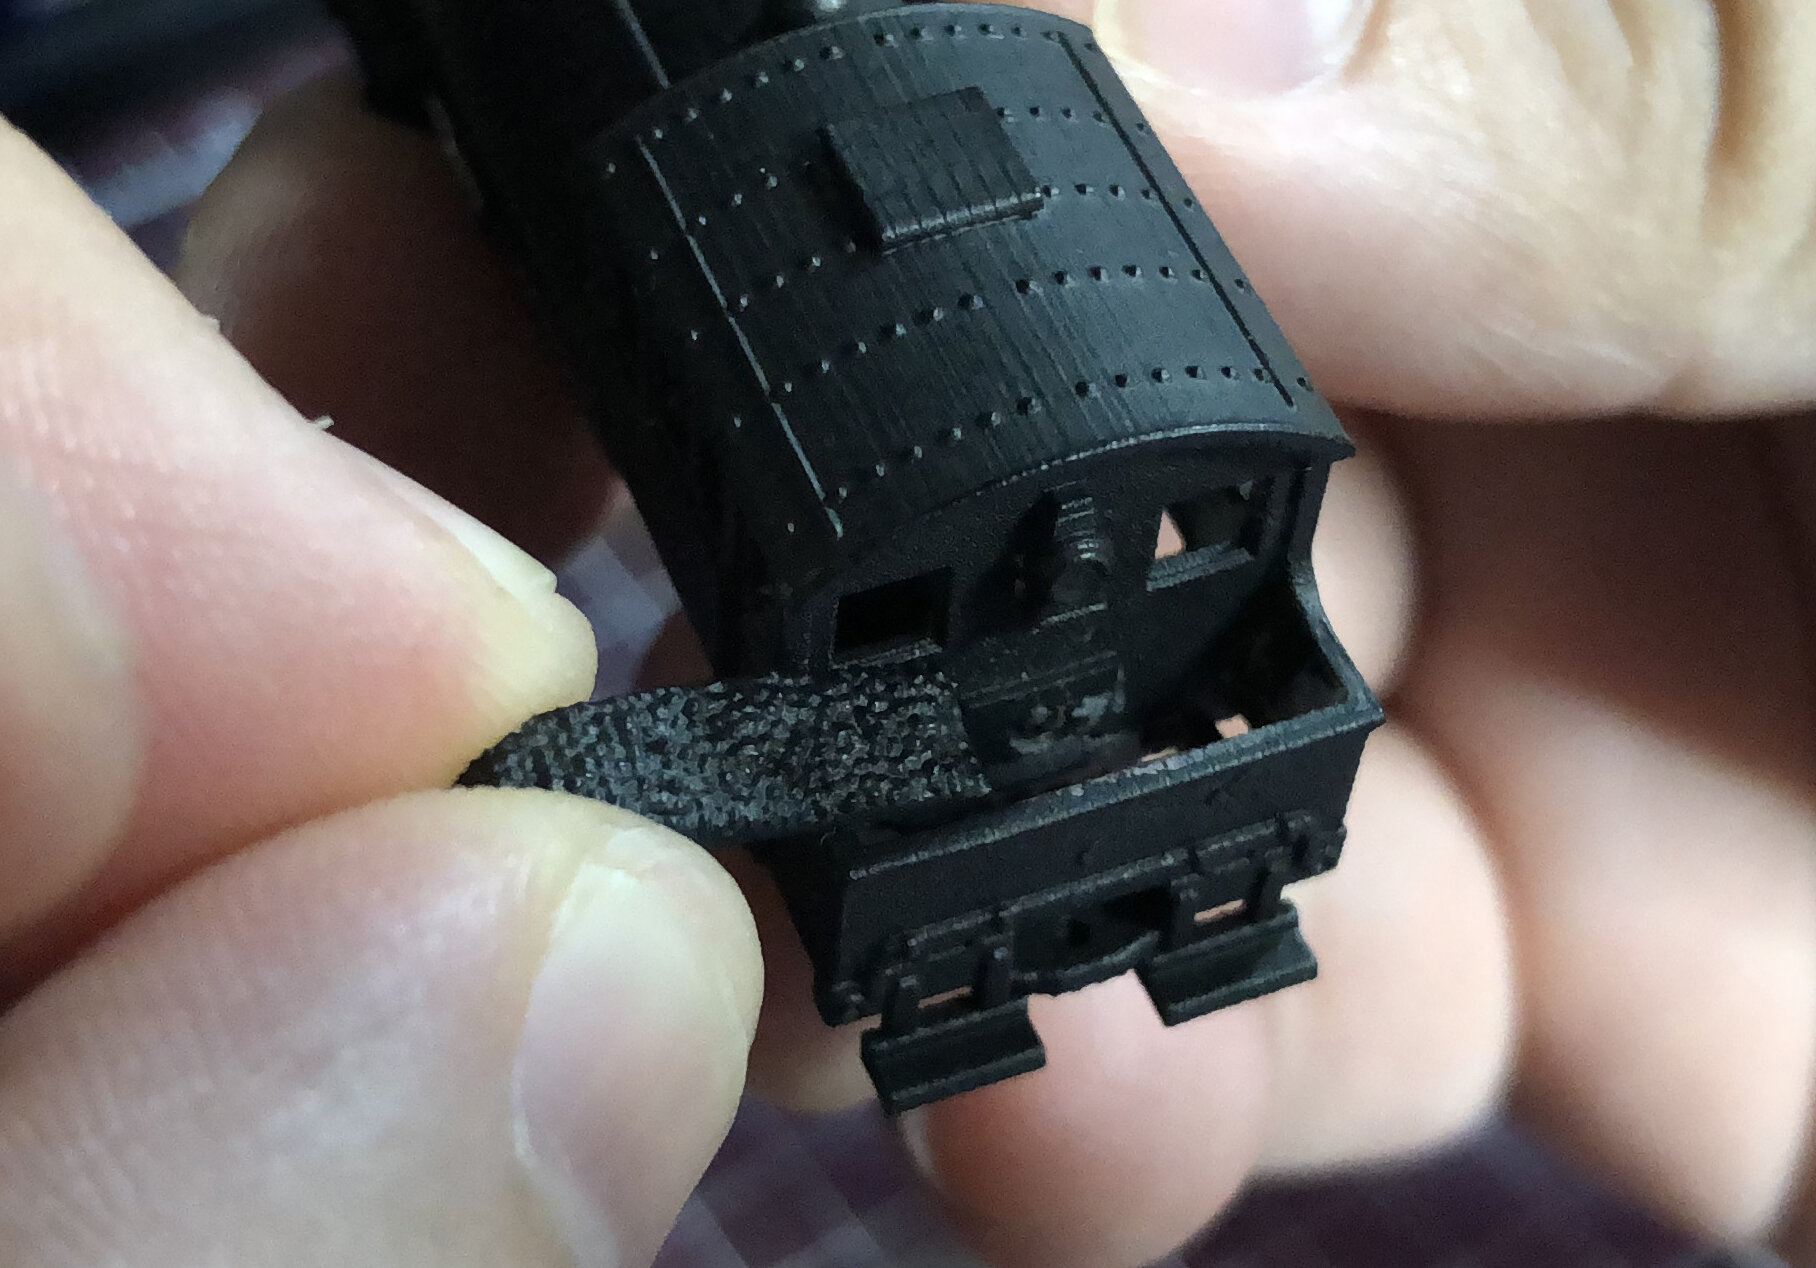
Step 14
Slide the coal details into the open bin then push it down. There is a slope built into the coal details. The low end of the slope will be at the back of the shell.

The Coal is Loaded

Step 15
The opening at the back of the shell will allow a Micro Trains Line 903 Body Mount Coupler.

A Tight Fit
The coupler should fit with enough friction to hold it in place and pull trains.
If you want extra security, there is a hole under the shell that will fit a screw from the Micro Trains Line 903 Body Mount coupler kit. Use the Micro Trains Tap and Drill kit to prep the hole for the screw.

The front coupler
In Step 3, you may have installed the Micro Trains Line 902 Short Shank Coupler to replace the front Marklin coupler. If so, you will notice it does not stick out very far. It does fully function but it is a good idea to lower the magnetic bar so it does not collide with the shell.

Done!
If you ever need to remove the shell:
-push the coal details out from the bottom with a toothpick
-push in the chassis button with a toothpick from the top of the coal bin.
-push the shell forward then up to remove.